

What Is A Cheese Press? What It Is Used For & How To Utilize One : Cheese making is one great thing plenty of people are interested in doing. In fact, nothing beats the excitement of having a useful cheese press and understanding the basic techniques of making cheese at home. And while cheese presses can come in various kinds and sizes, the most important thing about them is that they are simple implements used in pressing curds into cheese.
Under any circumstance, you may wish to have some well prepared cheese yet thick enough to whet your appetite. However, this doesn’t seem a reality except you have a reliable press and have mastered how to use the device. If you are a beginner, you can have one of the beginner cheese makers available in the market and make delicious cheese at home.
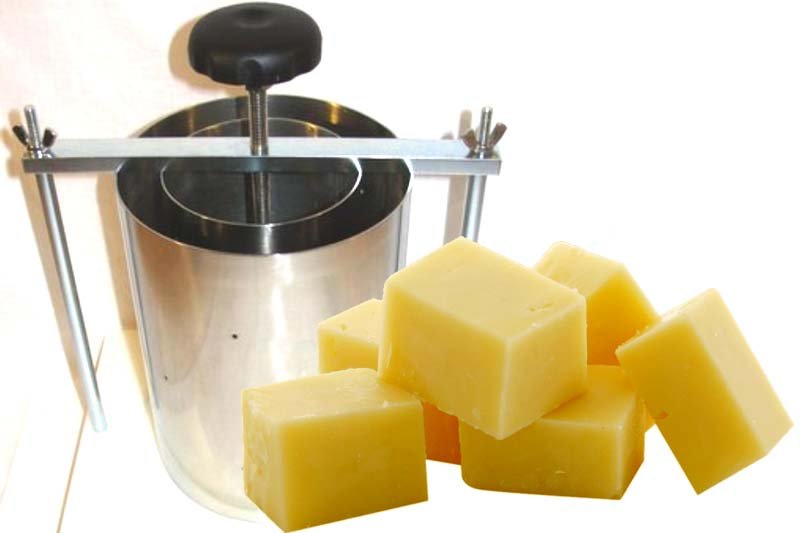
Using a Cheese Press
Before you start using your cheese press, ensure you rinse it with some warm water. Depending on the kind of press, you may or may not need cheesecloth.
After the first rinsing, look for a non-fragrant sanitizer; use it in cleansing the press and then spray it with warm water once again. If the press comes with a white plastic tube (or a hoop), avoid placing it in heated water exceeding 60 Celsius. Also, avoid placing this tube into dishwasher.
Having rinsed the cheese press and set it properly, you can then use it by placing the hoop in the centre of the base-plate. Importantly, put all the curds (you wish to press) into the plastic tube ensuring that they are evenly laid out.
For an even layout of the curds, lay the follower on the curds and slowly press down. You should do this after having set the washer in the center hole of the follower. Before you start pressing at all, take the caution of spreading the curds smoothly in the hoop. Otherwise, the curds will likely lean aside as you begin using the center screw in pressing them.
While using the press, it’s important to prevent the follower from wear and keep the spring in position. To do this, set the centre hole of the follower properly and place the spring into it. Grab the handle counter and twist clockwise while positioning the support arm on the side posts. At this point, it’s advisable to clasp the support arm by tightening the wing-nuts but not necessarily extremely.
With that done, you can start tightening the cheese press till you get your desired pressure. Endeavor to know how much pressure you have applied and while it’s possible for whey to be cut off in the cheese, you can avoid this by ensuring that the centre screw is not excessively tightened right from the start.
To simply keep whey out of the curds, apply the least possible pressure within the first three hours. You can start and maintain this pressure by completely turning the screw twice. Ensure the cheese remains at this pressure for some hours before completely turning the screw once again. Before noting the amount of turns you have made, ensure the cheese sits for at least one more hour.
Obviously, your cheese will increase in thickness depending on the number of turns you have made. After your first two complete turns, the cheese must have amounted up to 4.5-6.8 kg in weight. And if you really wish for very thick cheese, roughly at a weight of 22.6 kg, you can apply 5 complete turns. Once you’ve got the desired level of thickness, remove the cheese from the hoop and then turn it so that you can begin pressing its opposite side after returning it to the hoop.
Related Videos about What Is A Cheese Press :
Easy and Inexpensive DIY Cheese Press
We have a new cheese press
What Is A Cheese Press? What It Is Used For & How To Utilize One
cheese press plans pdf, professional cheese press, diy hard cheese mold, cheese press india, whey station cheese press, how to make cheese, cheese making baskets, 165mm cheese mold,